Beside to capture picture, the DSPack component also can be used to record or capture video. Besides, the DSPack component still have a lot of function, such as to detect a movement (motion detect), to recognize face (face recognition), to detect the edge of picture (edge detection) etc.
To make video recorder using DSPack, enter the component below:
| No. | Component Pallete | Component Name | Property | Value |
| 1 | Ds Pack | Filter1 | FilterGraph | FilterGraph1 |
| VideoWindow1 | FilterGraph | FilterGraph1 | ||
| FilterGraph1 | Mode | gmCapture | ||
| Standard | Button1 | Caption | Choose Folder | |
| Name | Buttonsavefolder1 | |||
| Standard | Button2 | Caption | Start Save Video | |
| Name | Buttonsave1 | |||
| Standard | Button3 | Caption | Close | |
| Name | ButtonClose | |||
| Win32 | StatusBar1 | Check the note under the table | ||
Double click the component and then will appear, 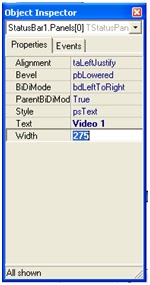  Then Click the object inspector and type Video1 on Text Property | ||||
Manage the image detail become as follows:

Picture1. Image Program Design.

Before type the source code, please declare this following global variable

After that enter the source code program as follows:
The Result Of The Program Execution is as follows:
| No | Component Name | Event | Source Code |
| Form1 | OnCreate | var i : integer; begin CapEnum:= TSysDevEnum.Create(CLSID_VideoInputDeviceCategory); for i := 0 to CapEnum.CountFilters - 1 do begin combobox1.Items.Add(CapEnum.Filters[i].FriendlyName); buttonsave1.Enabled:=false; buttonsavefolder1.Enabled:=false; end; | |
| ComboBox1 | OnChange | FilterGraph1.ClearGraph; FilterGraph1.Active := false; Filter1.BaseFilter.Moniker := CapEnum.GetMoniker(combobox1.ItemIndex); FilterGraph1.Active := true; with FilterGraph1 as ICaptureGraphBuilder2 do Renderstream(@PIN_CATEGORY_PREVIEW, nil, Filter1 as IBaseFilter,nil, VideoWindow1 as IbaseFilter); FilterGraph1.Play; buttonsavefolder1.Enabled:=true; | |
| Buttonsavefolder1 | OnClick | if savedialog1.Execute = true then buttonsave1.Enabled:=true; | |
| Buttonsave1 | OnClick | var multiplexer: IBaseFilter; Writer: IFileSinkFilter; i:integer; begin VideoMediaTypes.MediaDescription[i]; savefile1:=savedialog1.FileName ; if FilterGraph1.Active then FilterGraph1.Active:=false; FilterGraph1.ClearGraph; //active filter graph FilterGraph1.Active:=true; // now render streams with FilterGraph1 as IcaptureGraphBuilder2 do begin // set the output filename SetOutputFileName(MEDIASUBTYPE_avi, PWideChar(saveFile1), multiplexer, Writer); // Connect Video preview (VideoWindow) if Filter1.BaseFilter.DataLength > 0 then RenderStream(@PIN_CATEGORY_PREVIEW, nil, Filter1 as IBaseFilter, nil , VideoWindow1 as IBaseFilter); // Connect Video capture streams if Filter1.FilterGraph <> nil then RenderStream(@PIN_CATEGORY_CAPTURE, nil, Filter1 as IBaseFilter, nil, multiplexer as IBaseFilter); end; FilterGraph1.Play; //show folder penyimpanan file StatusBar1.Panels.Items[0].Text:= saveFile1; | |
| ButtonClose | OnClick | application.Terminate; |
The Result Of The Program Execution is as follows:

Picture2. Result of Application Execution
I hope this article can give benefit to the visitors, readers, developer and me. Thanks for visiting and availability for sharing this article by pressing
or just press like button under this posting
 | Share this on Facebook |
